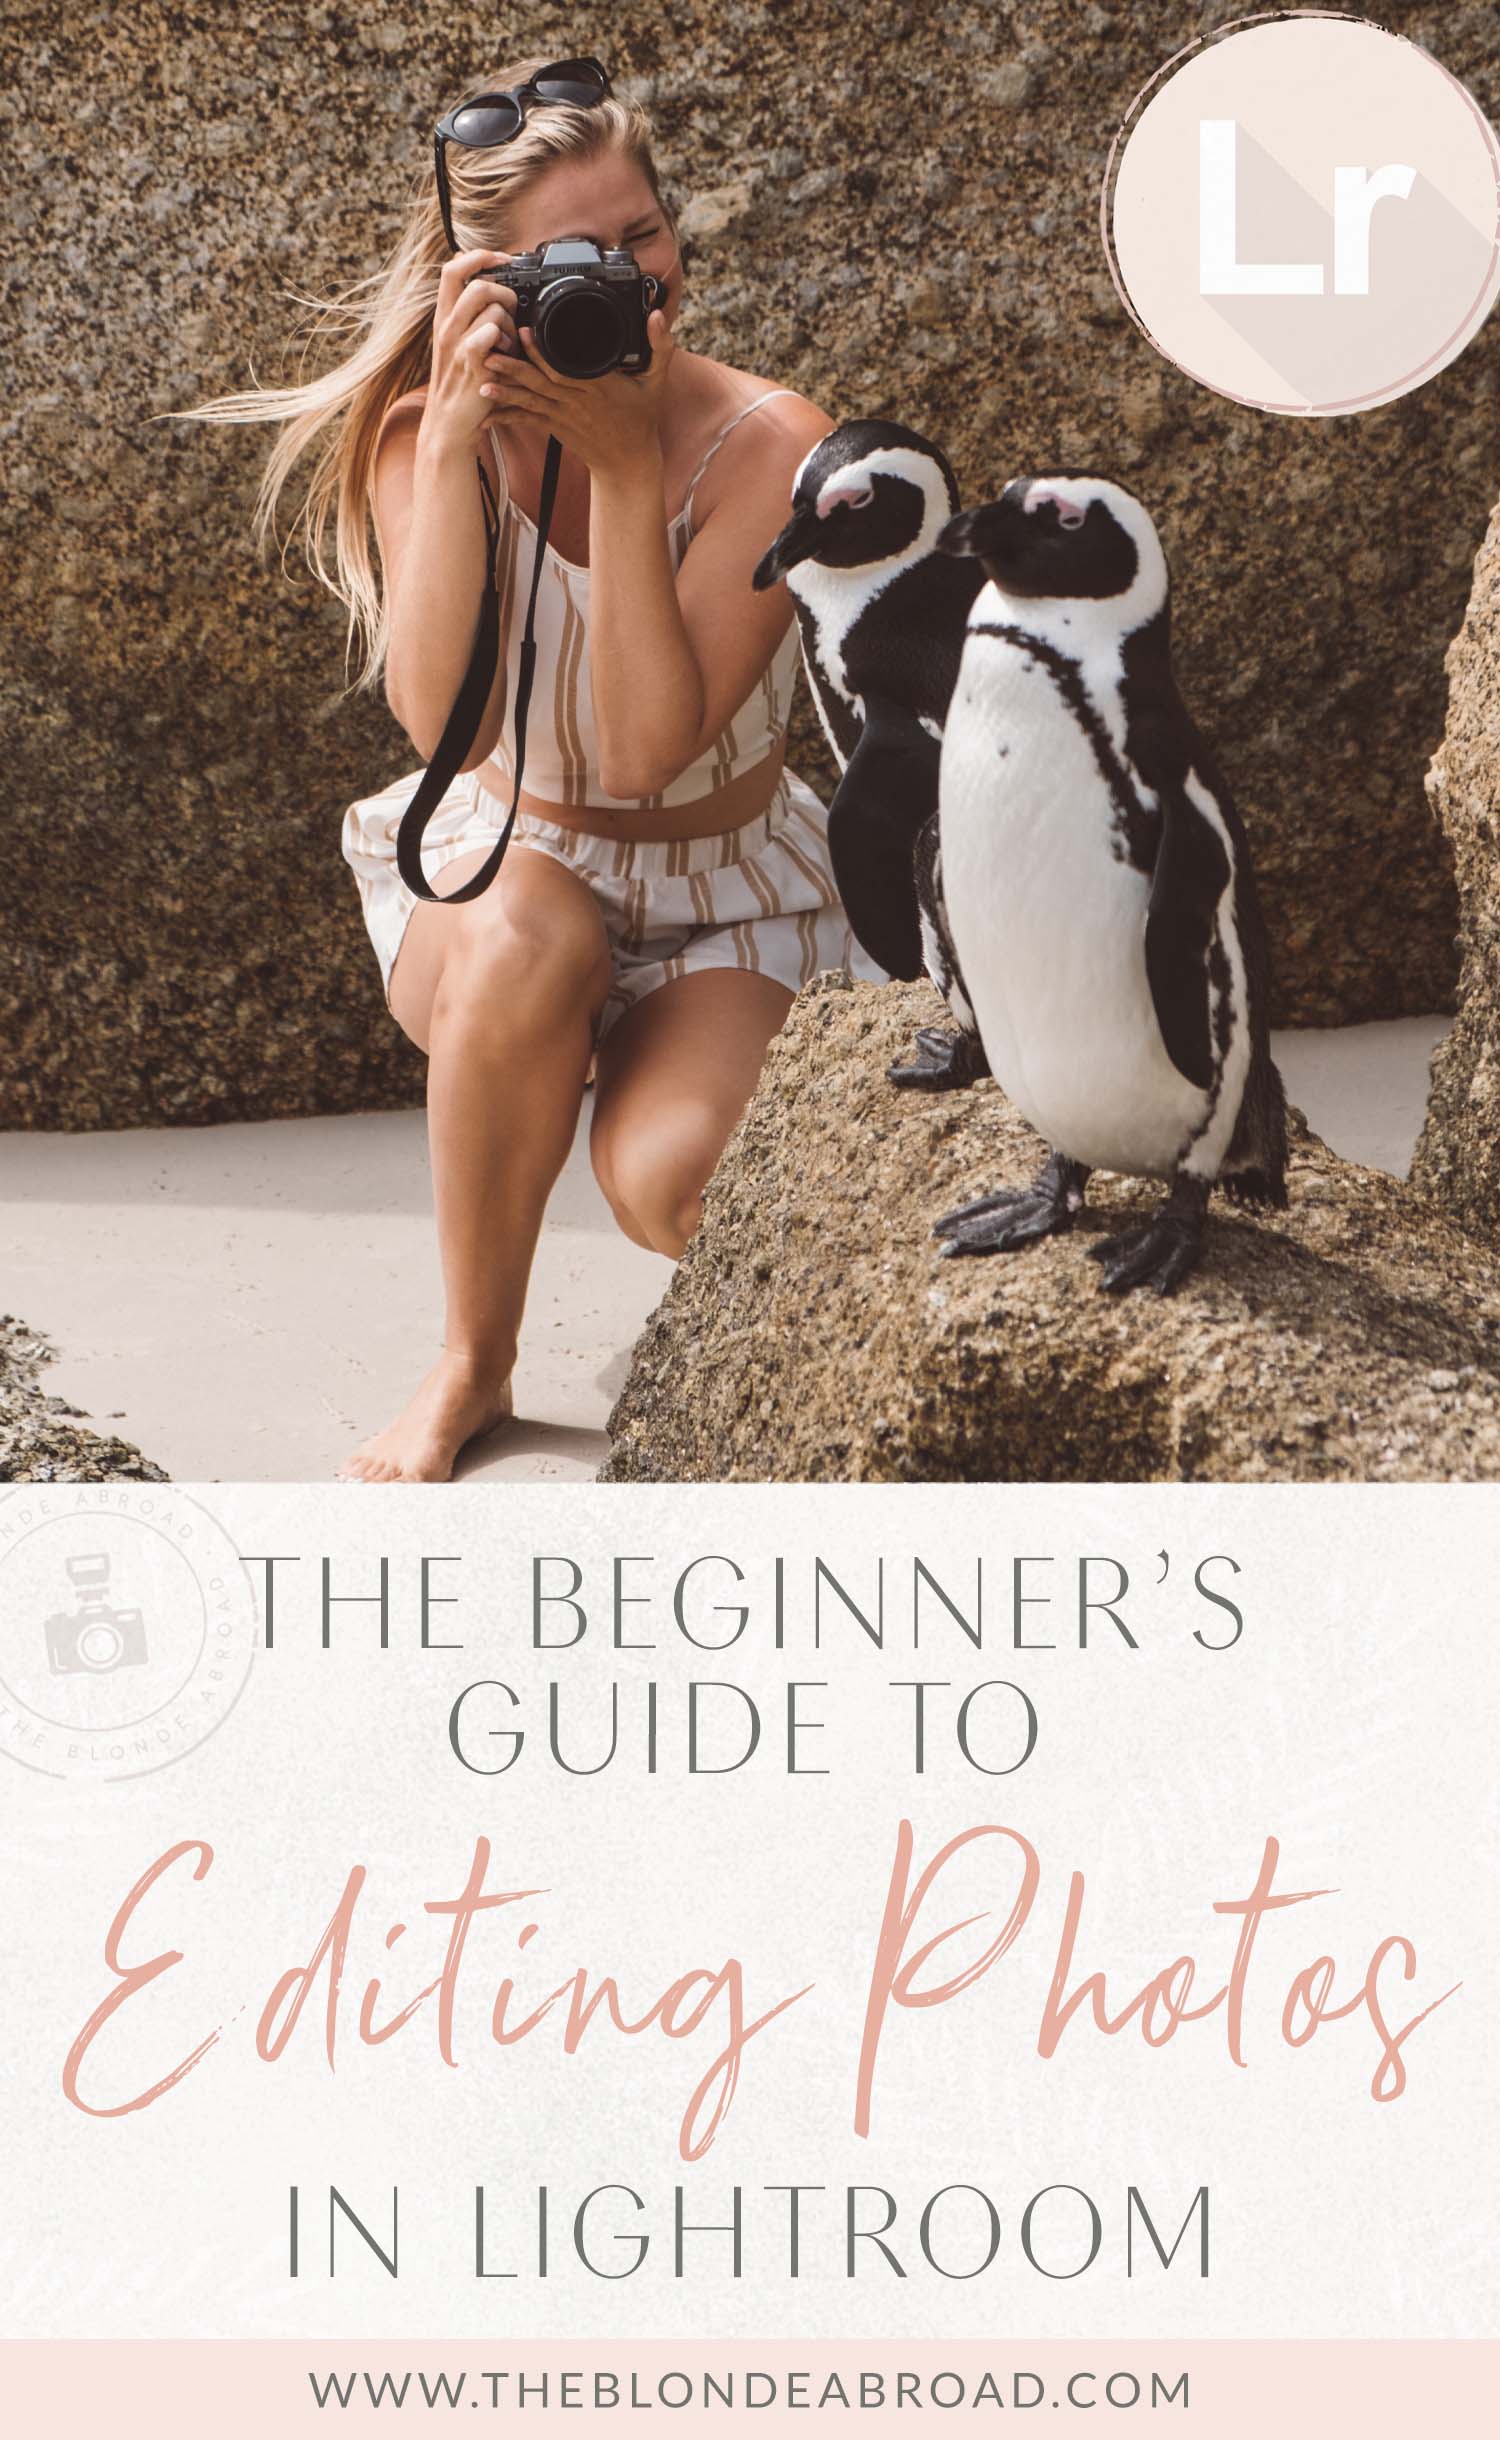
Are you looking to improve your photography game? While one of the number one ways to make drastic changes and take the photos you actually want is by learning how to photograph in manual mode—you can also make your photos shine with a good edit.
And for that, learning how to edit them in a consistent manner in Lightroom is key!
I know that Lightroom can seem overwhelming with all the different develop settings and sliders—so that’s why I’m breaking it down to explain it step-by-step!
These tips are for editing in Lightroom Classic for desktop. I’d recommend signing up for the Adobe Creative Cloud Photography Package. Then, download Lightroom Classic to get started!
Here’s the beginner’s guide to editing photos in Lightroom Classic!
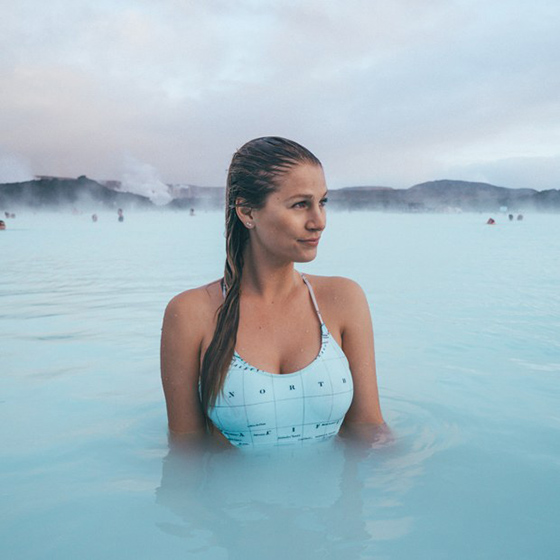
![]()
Editing RAW VS JPEG
Editing RAW and JPEG photos can be a little bit different. And both options present their own pros and cons.
With RAW, there’s a lot more wiggle room to saving or recovering a photo, just in case you didn’t nail your settings or are shooting in tricky lighting. For example, you are able to lift shadows without losing the details of your image. However, the file is ENORMOUS.
If you are still learning how to shoot, JPEG is totally fine. But, are you are limited in the quality of the image and it’s much more difficult to lift shadows and drop highlights while retaining the image detail. I would recommend getting to a point where you can shoot and edit RAW.

The Beginner’s Guide to Photographing in Manual Mode
If you’re interested in stepping up your game in photography, check out my guide to shooting in manual settings and why I always shoot in RAW.
Read More!
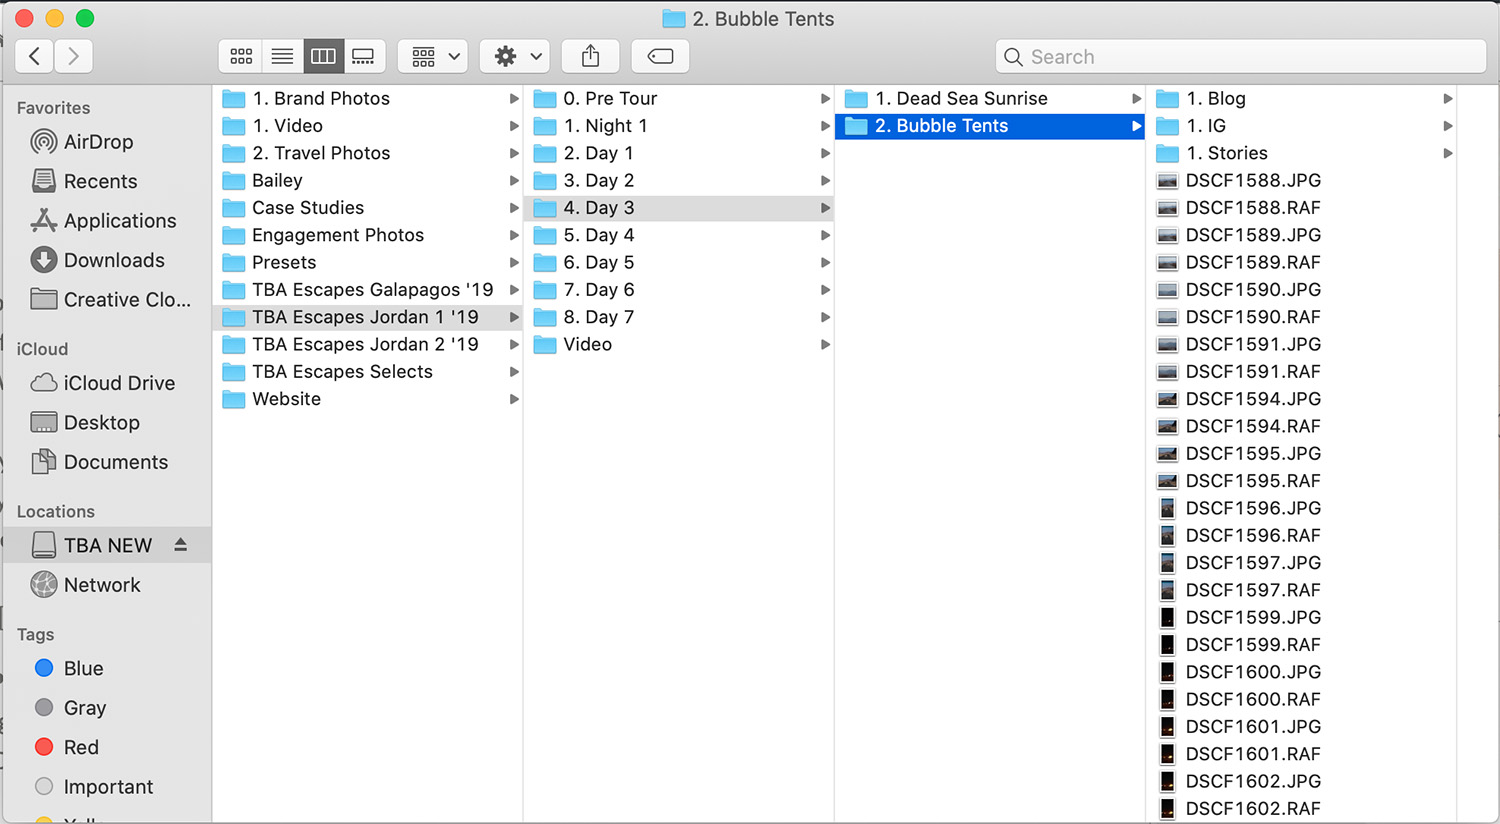
Pro Tip: Organize Your Files
As you start saving your image files (and before you start editing) it’s important to organize your photos into ‘easy to find’ folders.
If you are in the habit of saving photos to your desktop, I would suggest getting a portable external hard drive and saving them there.
All of my photos are saved on external hard drives to free up space on my computer—but more on that later.
The above screenshot is a sample of how I organize all of the photo files from my trips on an external hard drive.
I typically organize by the destination, then by day.
I often use numbers (1., 2., 3., etc.) to preface the folder names if I want them to fall in a certain order. That way my photos are always easy to find.
Pros of Using an External Hard Drive
It keeps your computer fast. There are small portable hard drives available you don’t really have to worry about having to travel with a couple of them. If you’re shooting in RAW or a very high-res JPEG, the file size is MASSIVE, which is why you don’t want to save these files to your computer. You’ll run out of computer memory pretty quickly.
I travel with multiple 4 TB portable hard drives so that I never run out of space to save my files.
You should also back up your hard drive onto a separate hard drive so that you have backups of everything in case a drive is lost or crashes.
Cons of Using an External Hard Drive
They can crash and this has happened to me more than a few times. A solid-state drive is way more expensive and typically holds less memory, but if you’re an adventure traveler, I would recommend using one of those and then backing up to a hard drive that you don’t travel with.
Another con? You always have to have your external hard drive plugged in whenever you want to access those files. So, it can be inconvenient.
![]()
Tips for Importing Files
Once you’ve got your files organized, it’s time to start importing them into Lightroom.
NOTE: Wherever you decide to save your files, you want to wait to import your files until they’re saved where you’ll keep them permanently.
For example, NEVER import a file into Lightroom directly from your camera’s SD card.
Lightroom doesn’t import the entire file like other types of photo storage software. It simply uses the ‘source’ data of the file and works off a smaller amount of data to edit.
It’s important to recognize that Lightroom does NOT save full files of your photos because if you ever delete the original image or move it after importing, Lightroom won’t be able to find the source file. So, if you imported the image into Lightroom from your SD card, then eject your SD card, Lightroom won’t be able to find the ‘source’ file.
Lightroom won’t ever edit your original image, which is a good thing!
That’s why I organize my files on my hard drive FIRST (where I will keep them forever), then import into Lightroom.
![]()

How to Import Files into Lightroom
You can either click and drag a folder onto the Lr desktop icon and the program and import screen will automatically open, or you can open Lightroom and click import, then select the folder you want to import from.
I prefer to drag entire folders into Lightroom so that I can preview all files and select my favorites from there.
First things first, your import settings have a few important areas to check. At the top of the screen, make sure you’re “ADD”ing To: “My Catalog.”
Optional
Under “File Handling:”
- De-Select: Build Smart Previews
- Select: Don’t Import Suspected Duplicates
When Importing:
Pro Tip:
Rating or Flagging Your Photos
Lightroom serves as a way to organize your photos (usually by project or date taken). There are countless ways to organize your photos within folders from giving them certain ratings (Stars 1-5), or flagging them with certain colors.
I’d highly recommend watching a video on this and learning more to find a process that works best for you.
By rating or flagging your photos, it helps you narrow down and cull your shots, so that it’s easier to find your faves.
![]()
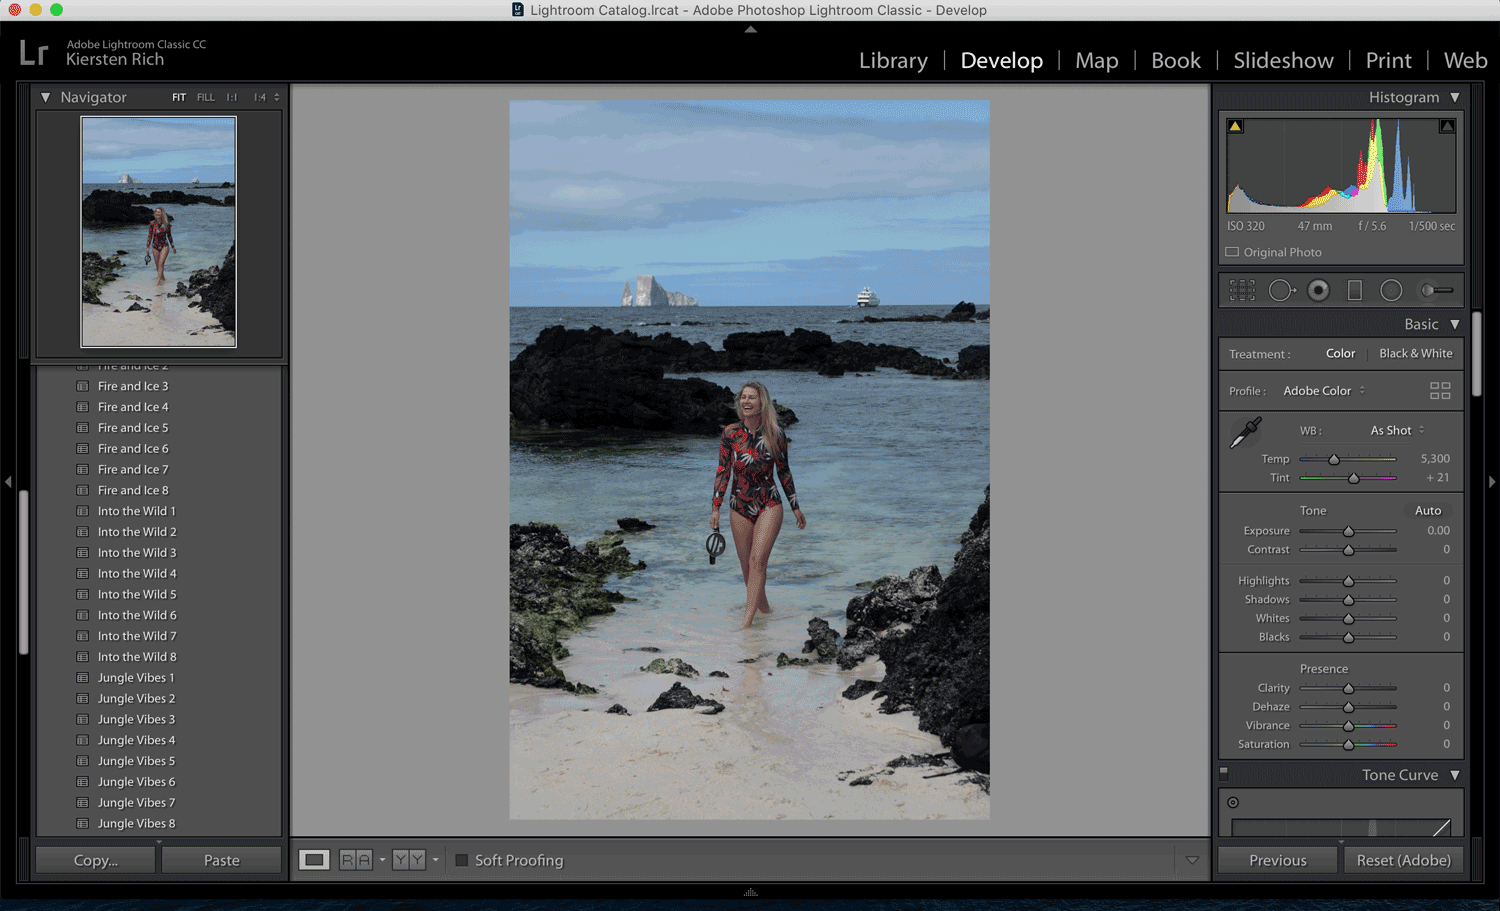
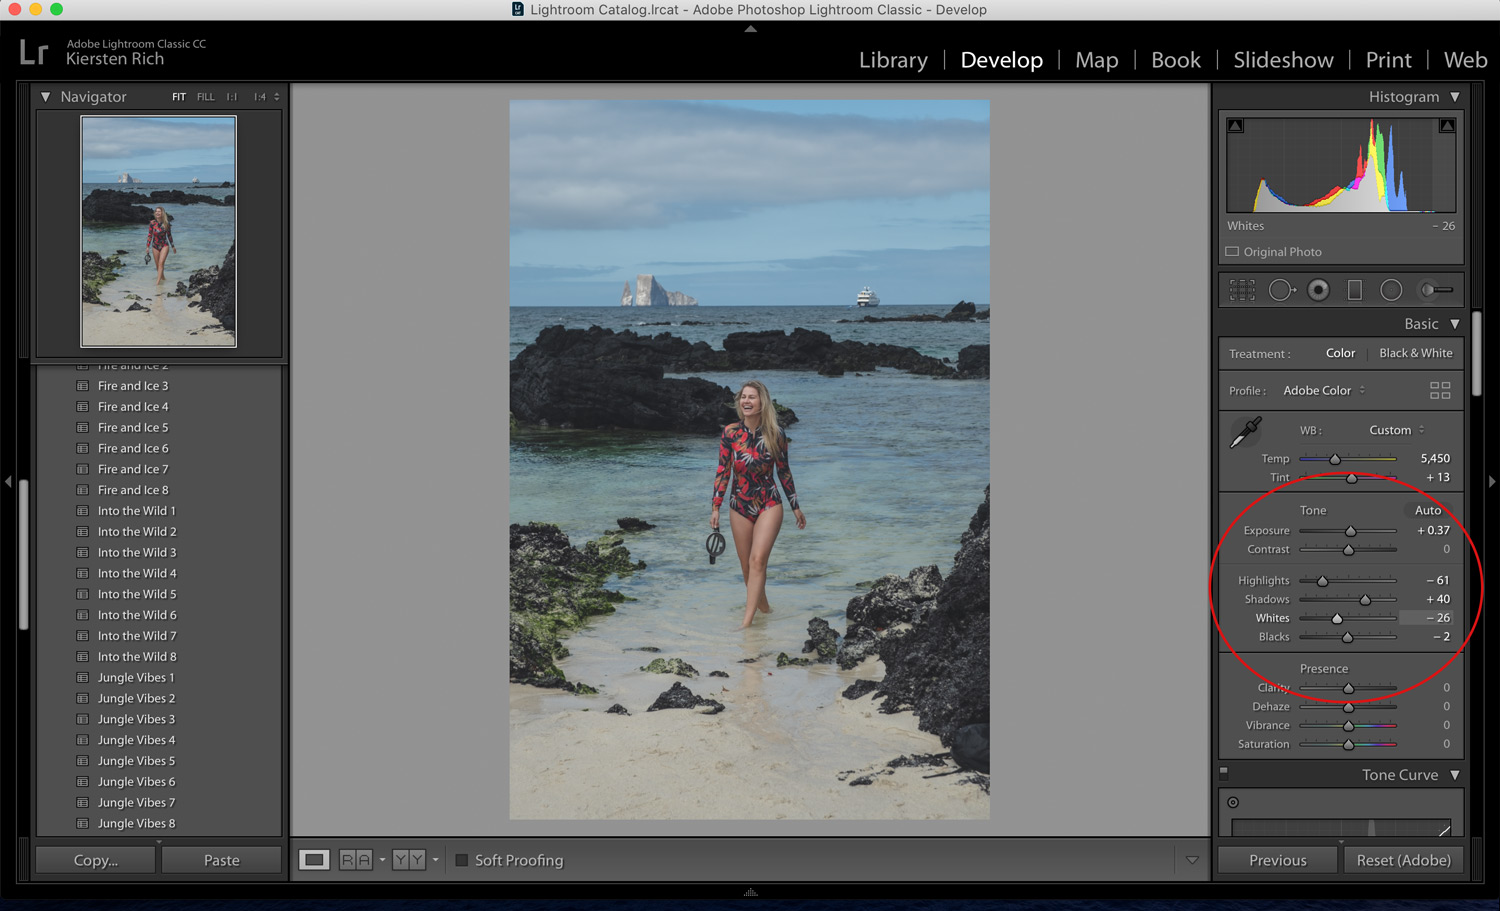
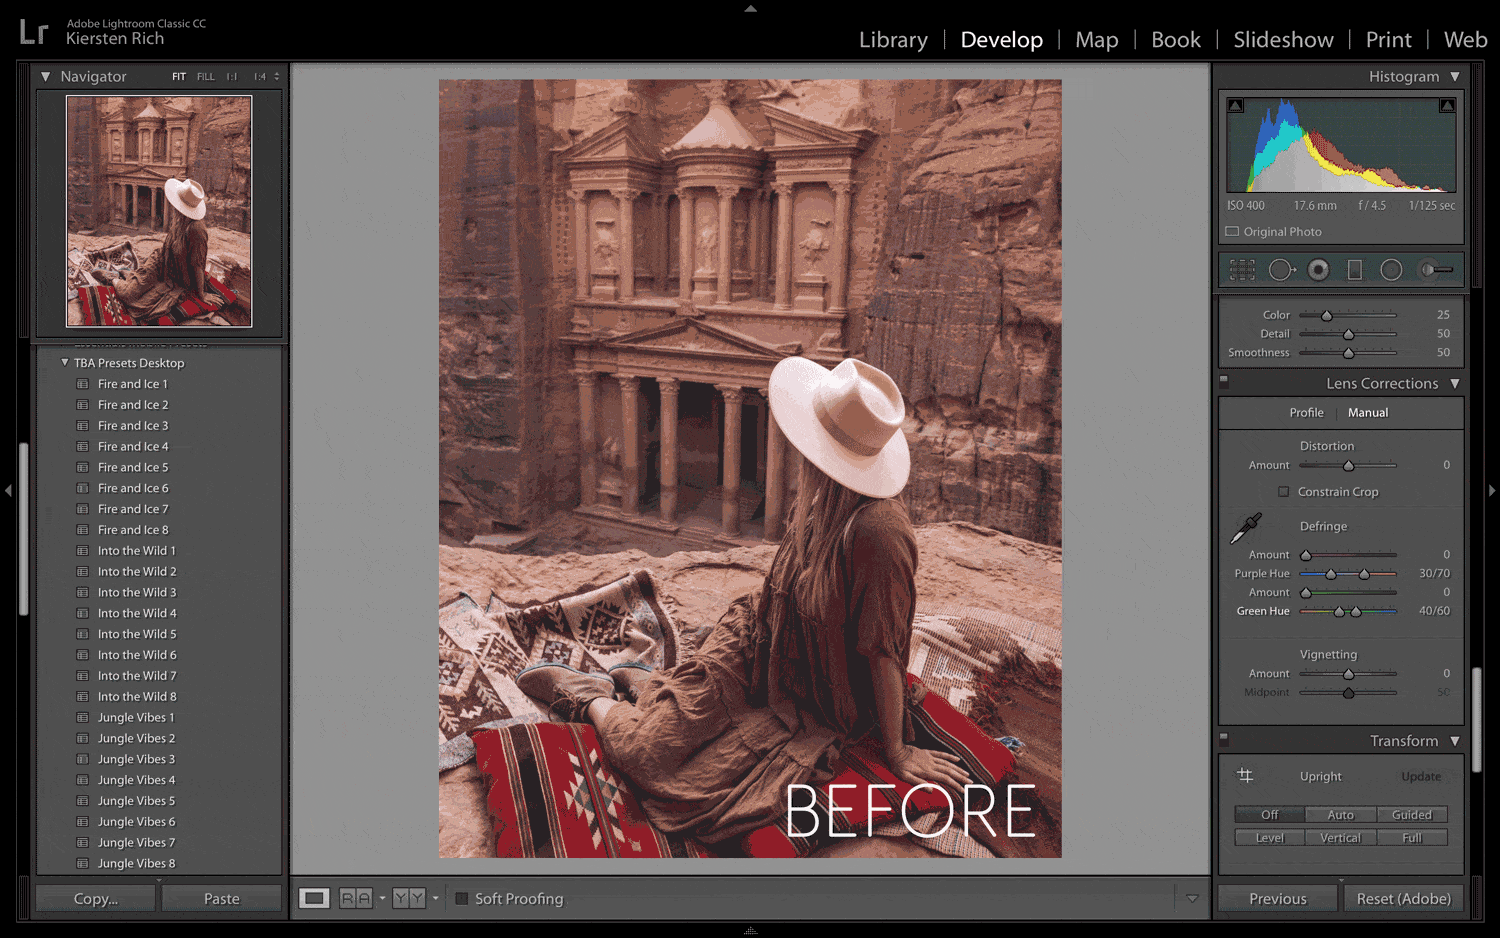
Apply a Preset
99% of the time, I use my presets to cut my editing time in half. The editing process from scratch or from a preset is the same. The preset gives you a jumpstart on getting closer to the final product.
While this is optional—I definitely recommend applying a preset!
As a note, a preset isn’t a filter. It’s more like copying and pasting settings. You can see with the example above what happens just in the “Tone” section of the Develop Module. Presets will have saved settings for Tone, Colors, Sharpening, Grain, etc.
There’s no one size fits all.
The best method for using presets is to sample each one until you get as close as possible to what looks best. Then, you can go in and fine-tune the photo settings using the following steps.
Which TBA Preset Pack is Right For You?
Want to easily achieve a cohesive look to your photos and cut down on the time it takes to edit them?
Read More!
TBA Lightroom Presets
Whether you’re just starting out with photography or have been shooting for years, these easy-to-use presets will instantly add a beautiful aesthetic to all of your images!
Shop Now
Play with the Lighting
Once you’ve got your photos in your Lightroom Library, on the top right, head to “Develop.” This is where the fun begins!
Exposure
Typically, the first thing I check is Exposure. I toggle the slide to higher or lower depending on what I’m going for—do you prefer light and bright or dark and moody?
There is no “right” or “wrong” way to do this, it ultimately comes down to personal preference and after playing with these different settings for a while, you’ll start to develop a sense for how you like to edit your photos.
Highlights, Shadows, + White Balance
After considering exposure, I always toggle my highlights, shadows, blacks, and whites to achieve my desired lighting effect.
Lifting shadows helps to show finer details. You can also toggle your blacks to make a photo appear soft and dreamy, or more contrasted.
With RAW photos, lowering highlights almost entirely helps to bring out more detail. If you’re editing JPEG images and find that your images are falling too flat, try adding in more highlights.
Shift White Balance
Play with both temperature and tint. Temperature essentially controls how blue or yellow your photo is—if you were taking it in a shaded area, you may want to increase the temperature for more yellow to compensate for the shadows.
![]()
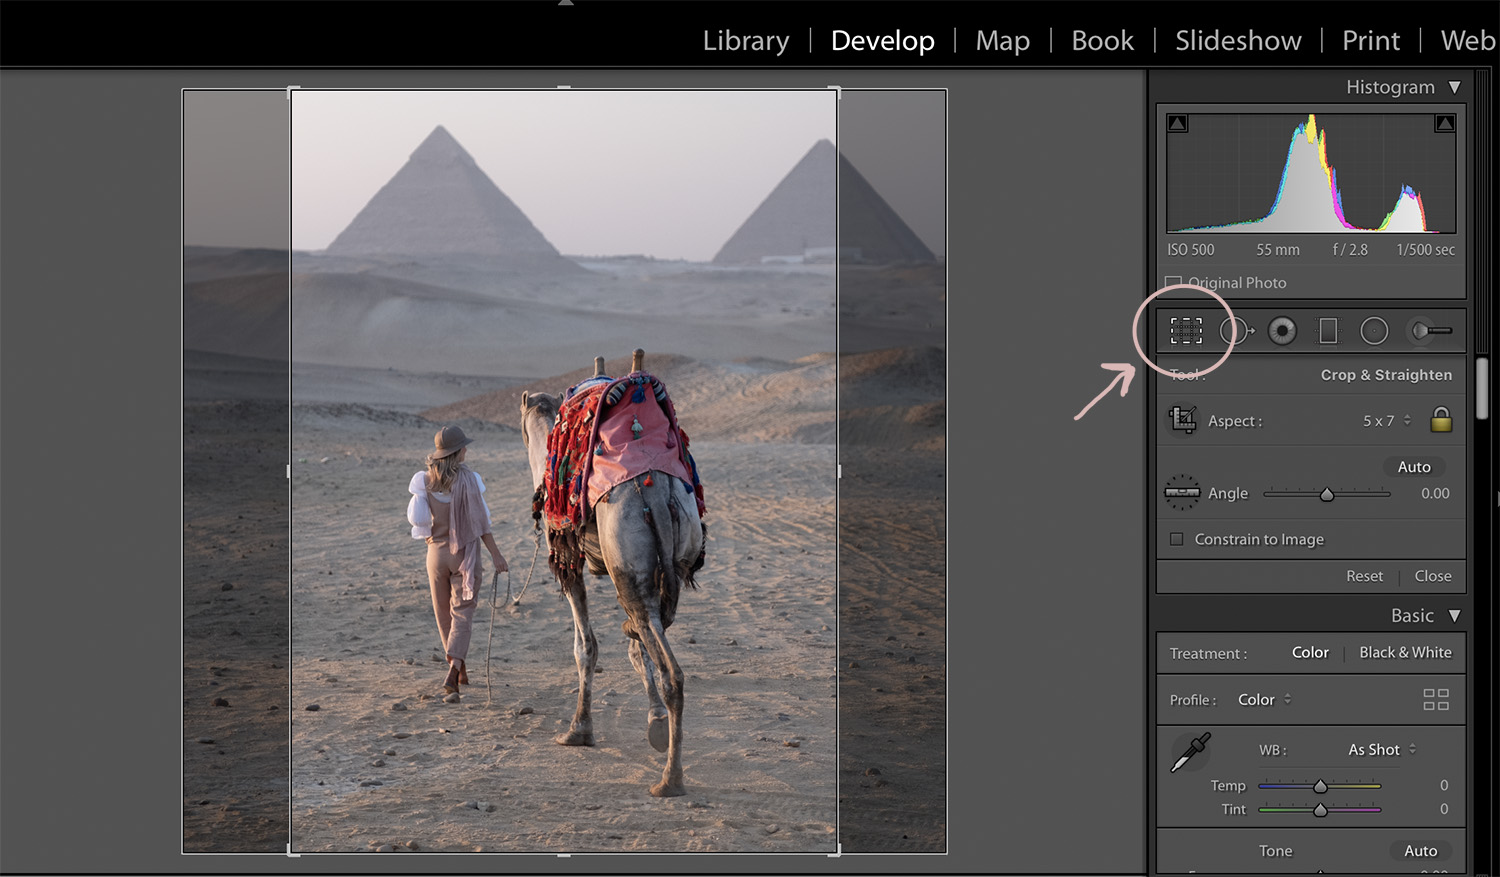
Crop, Adjust + Fix Distortion
Is this for Instagram, your website, another social media platform, or are you making print? Where your photo is going to be shared plays a bit into how you should crop it.
Other than that—as with everything in photography and editing—how you choose to crop a photo comes down to personal preference.
Click on the box-looking item on the right toolbar and it’ll bring up different aspect ratios for cropping. You can pick and choose from this list or create your own custom crop.
Helpful Tip:
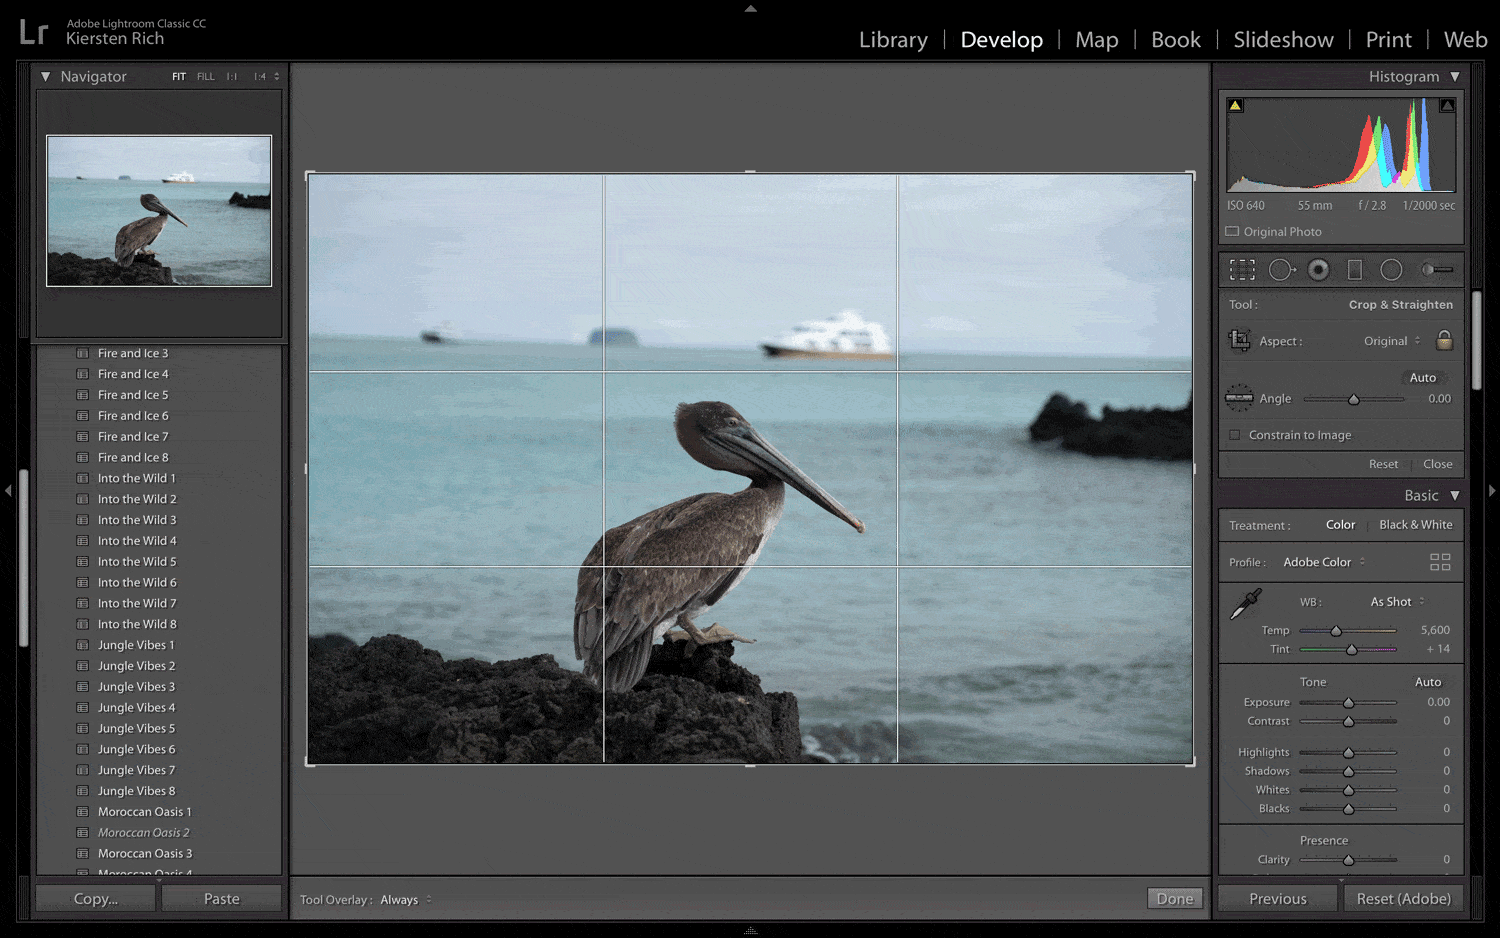
Adjust and Rotate
The first thing you should always do is adjust the horizon line. Unless you’re going for a creative and intentionally not straight image, having a straight horizon line is important for your image to look level.
Is the horizon line straight, do you need to correct any funky buildings or streetlamps?
You can do this under “Transform.” Typically applying the “Auto” setting works—but not always and you’ll have to adjust things manually. If you’re having a hard time with auto or manually tinkering with the rotation, you can use the angle tool to trace whatever you want to use as the ‘horizon’ line.
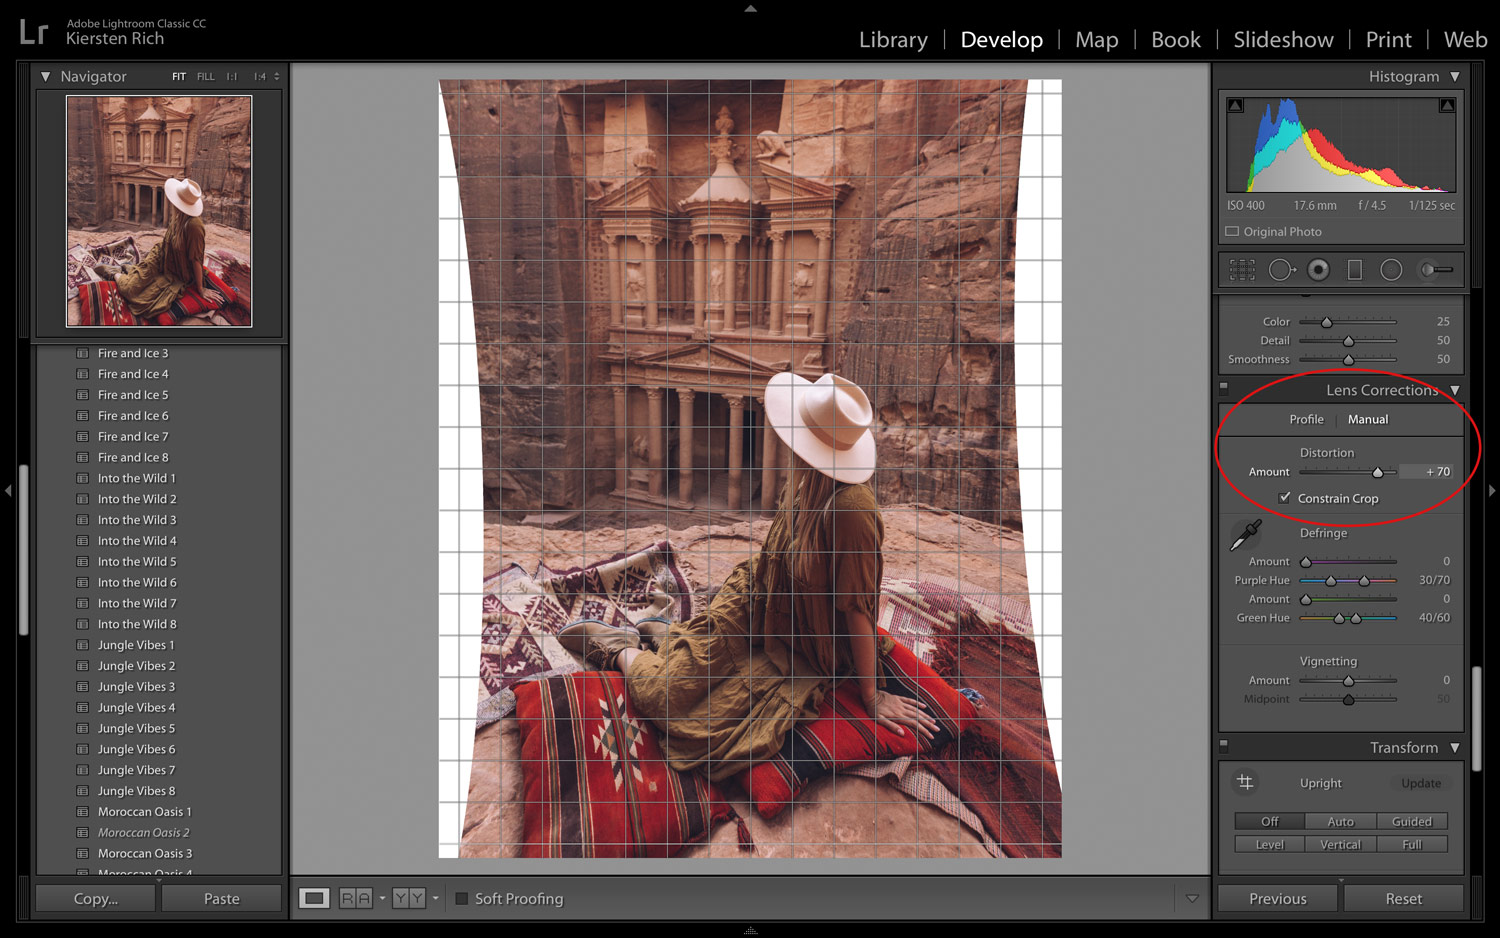
Fix Lens Distortion
Distortion basically warps your image like a fisheye either towards or away from you. You might not notice it at first, but once you’ve used the “Lens Correction” tool—it’s incredible to see how it can tweak an image and correct lens distortion.
For example, if you shoot on a GoPro, you can reduce the fisheye effect by sliding the distortion left. You can also manipulate your images as I have in the above example to ‘push’ the image in at the center. It’s a great tool for bringing the eye ‘IN” to the center of a photo.
![]()
Edit Color
The “HSL/Color Panel” in Lightroom is where I have the most fun. I typically click “ALL” to view all colors in a single panel, and can easily toggle the hue, saturation, and luminance of each color.
- H: Hue — the color spectrum of an individual color. For instance, take the color blue—you can have a deeper blue or more aquamarine color
- S: Saturation — you may already have used this if you’ve edited photos before as it’s quite a common step. It’s essentially the amount of pigment you have in a single color. So if you drag the saturation color, you’ll have less of the true color, whereas if you increase the saturation the color will be very bold.
- L: Luminance — the amount of light that comes through that color. So instead of removing the color, you’re adjusting how bright it becomes by adding lightness to it.
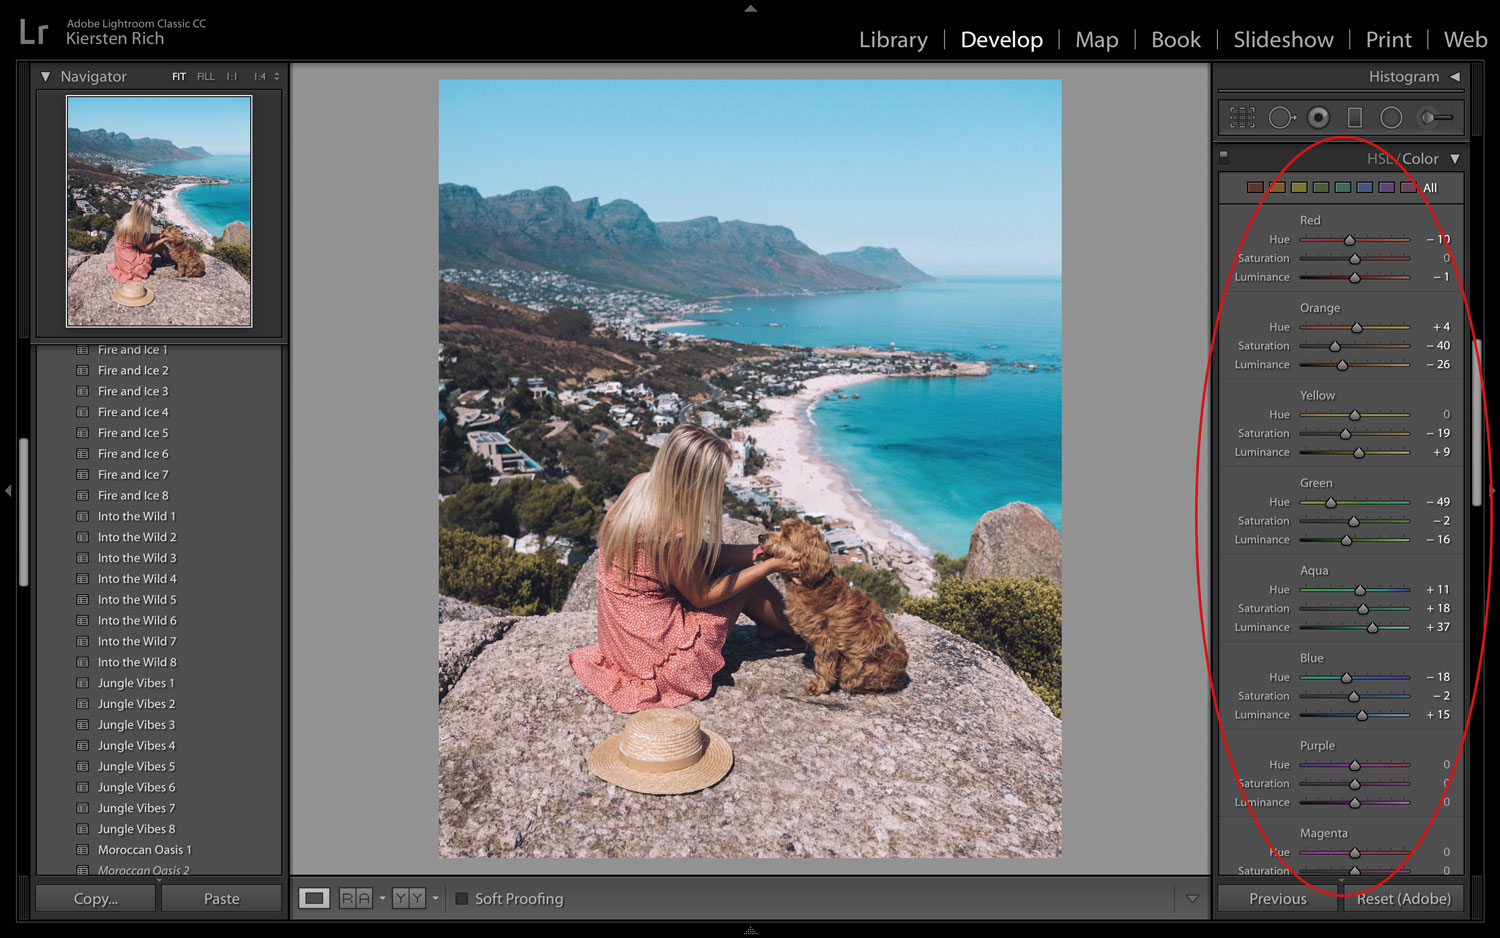
I play with all three of these settings for each individual color and the more you play around with them, the more fluid the whole process becomes.
Here are some tips on how I tend to use each individual color and the HSL related to each color:
Blue + Aqua: My Tropical Escape Collection presets play on those blue and turquoise hues. Lifting the blues by adding more luminance to them, and adjusting the hue to a more turquoise color, gives photos a bright and tropical feeling.
Green: My Jungle Vibes Collection is fantastic for photos with tons of greens and earthy tones—snaps taken in the jungle, in greenhouses, or places where you’re surrounded by plants! I like to lower the saturation and luminance of greens a bit and adjust the hue to be more yellow, which makes plants pop.
Orange: I really love when my skin has a glowing, golden tan…but I don’t always have the opportunity to work on that. Playing with the luminance of the orange allows me to have a more tanned appearance in just a matter of seconds.
Depending on your skin tone and which preset you’re using, this will always require some customization. I recommend adjusting the luminance and saturation of orange to achieve your desired effect.
Yellow: Since I am blonde, I pull the yellow luminance up a lot. It helps pop the highlights and tone of my hair. Obviously, if you don’t need to achieve the same effect, check the yellow settings in your preset and adjust accordingly.
Playing with the yellow can always be great for beach photos and adjusting the hue of the sand.
![]()
My Favorite Editing Tools
Helpful Tip:
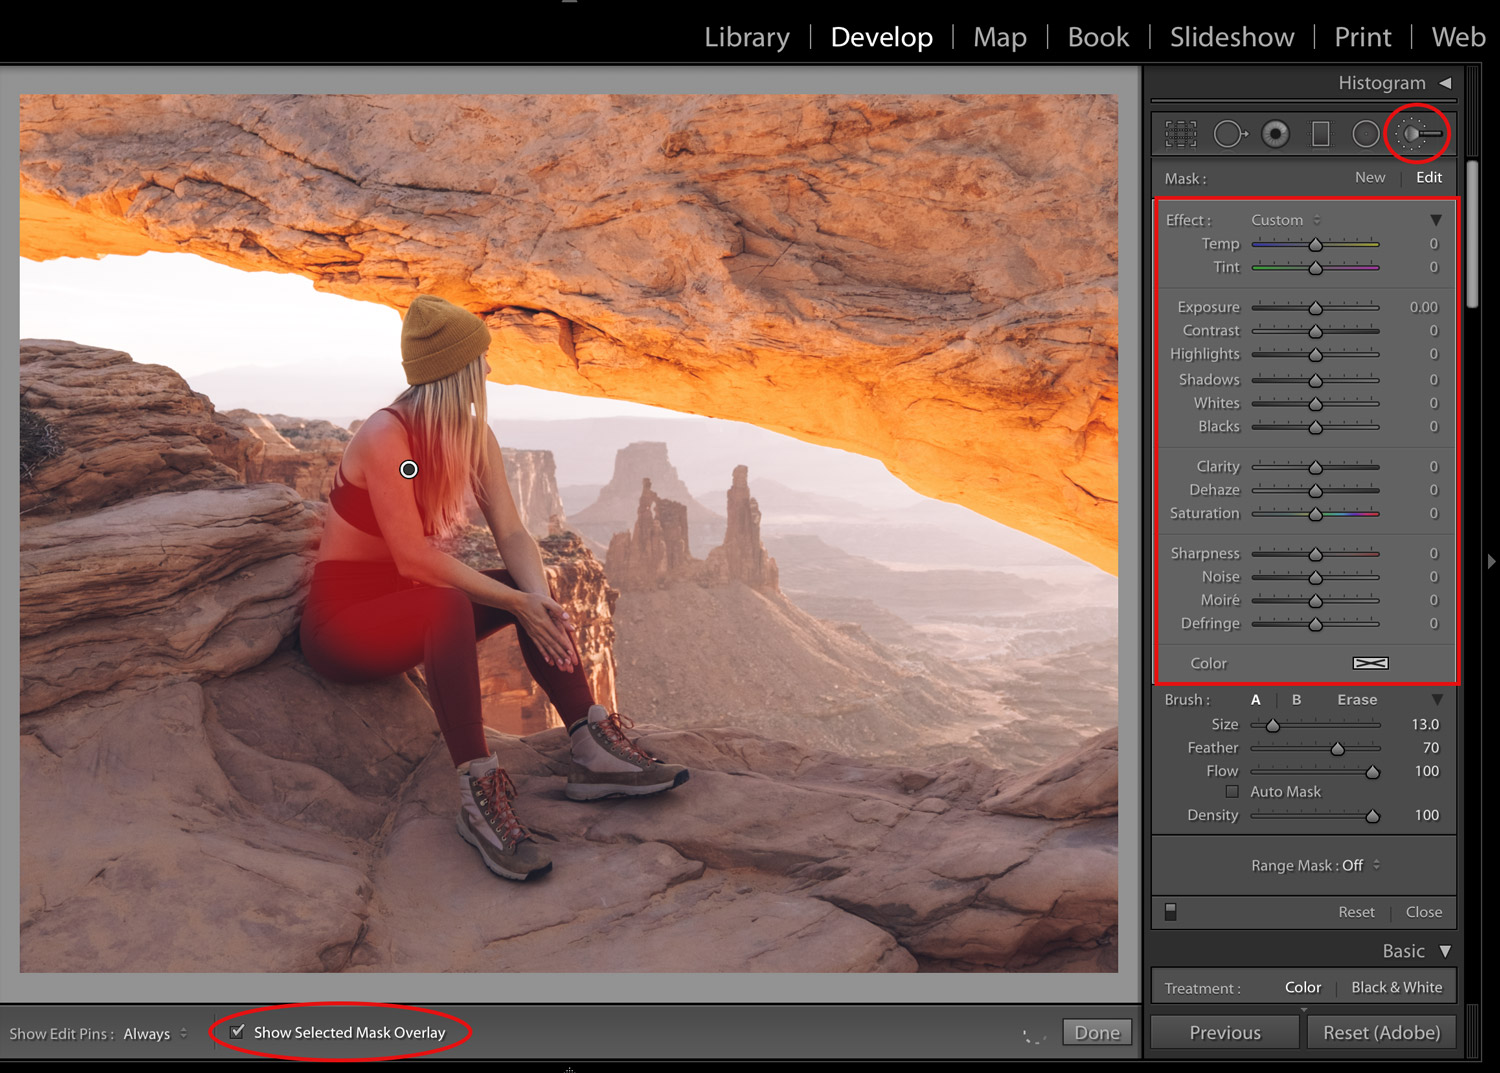
Brush Tool
The Adjustment Brush tool lets you selectively apply exposure, adjust clarity, adjust shadows and highlights, and apply other adjustments to photos by “painting” them onto a photo.
Check out the Full Adobe Brush Tool Tutorial Here
Helpful Tip:
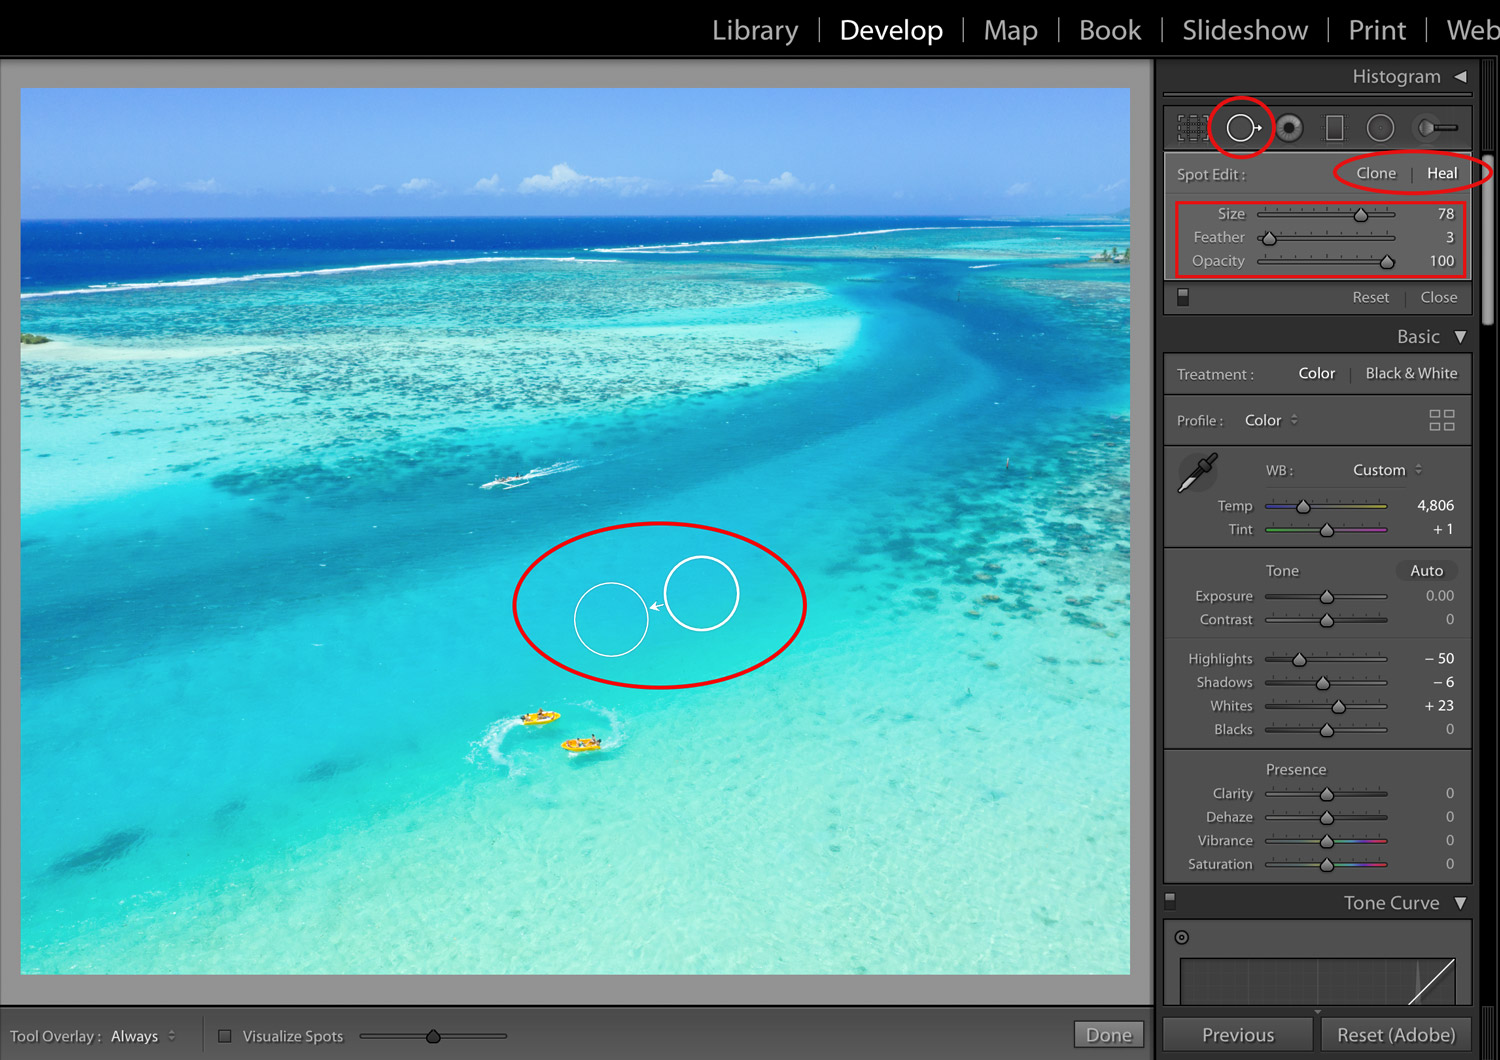
Spot Removal Heal Tool
The Spot Removal tool in Lightroom lets you repair a selected area of an image by sampling from a different area of the same image. Heal Matches the texture, lighting, and shading of the sampled area to the selected area. Think, removing unwanted bystanders from photos at the beach.
Check out the Full Adobe Spot Removal Tutorial Here
Helpful Tip:
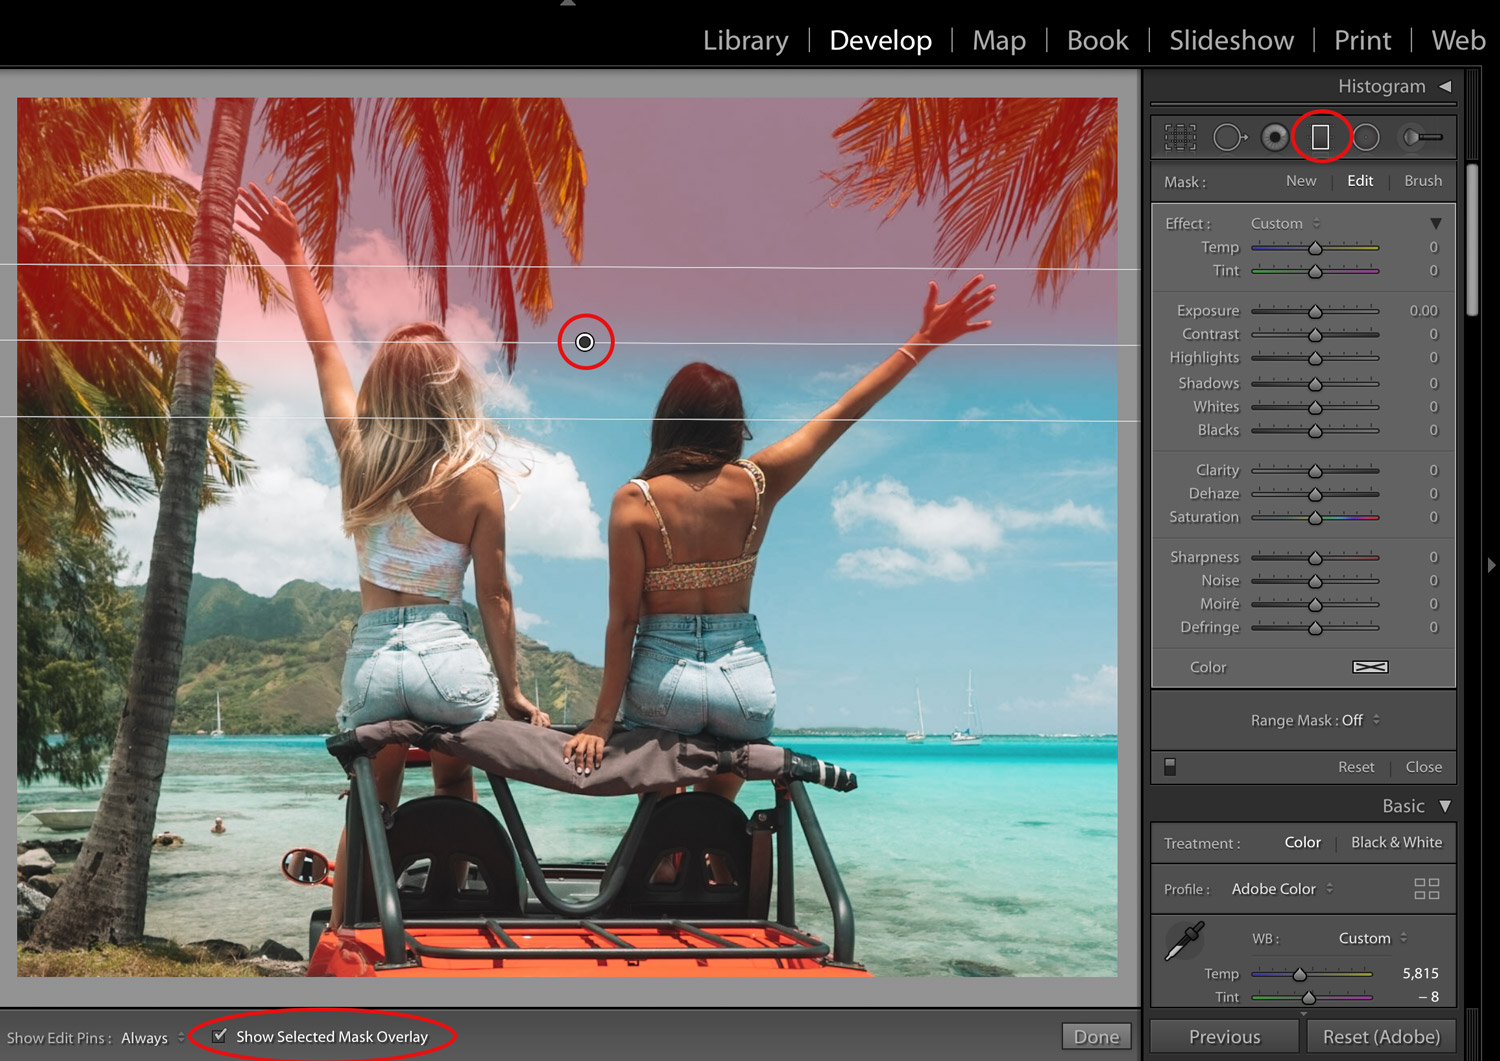
Graduated Filter Tool
The Graduated Filter tool lets you apply adjustments that “fade out” across a region of a photo (almost like an ombre effect). I often use it to reduce highlights in the sky by dropping Highlights or very slightly increasing the Dehaze adjustment. It works like the brush tool, but looks more natural on skies!
Check out the Full Adobe Graduated Filter Tutorial Here
Helpful Tip:
Export at Appropriate Size
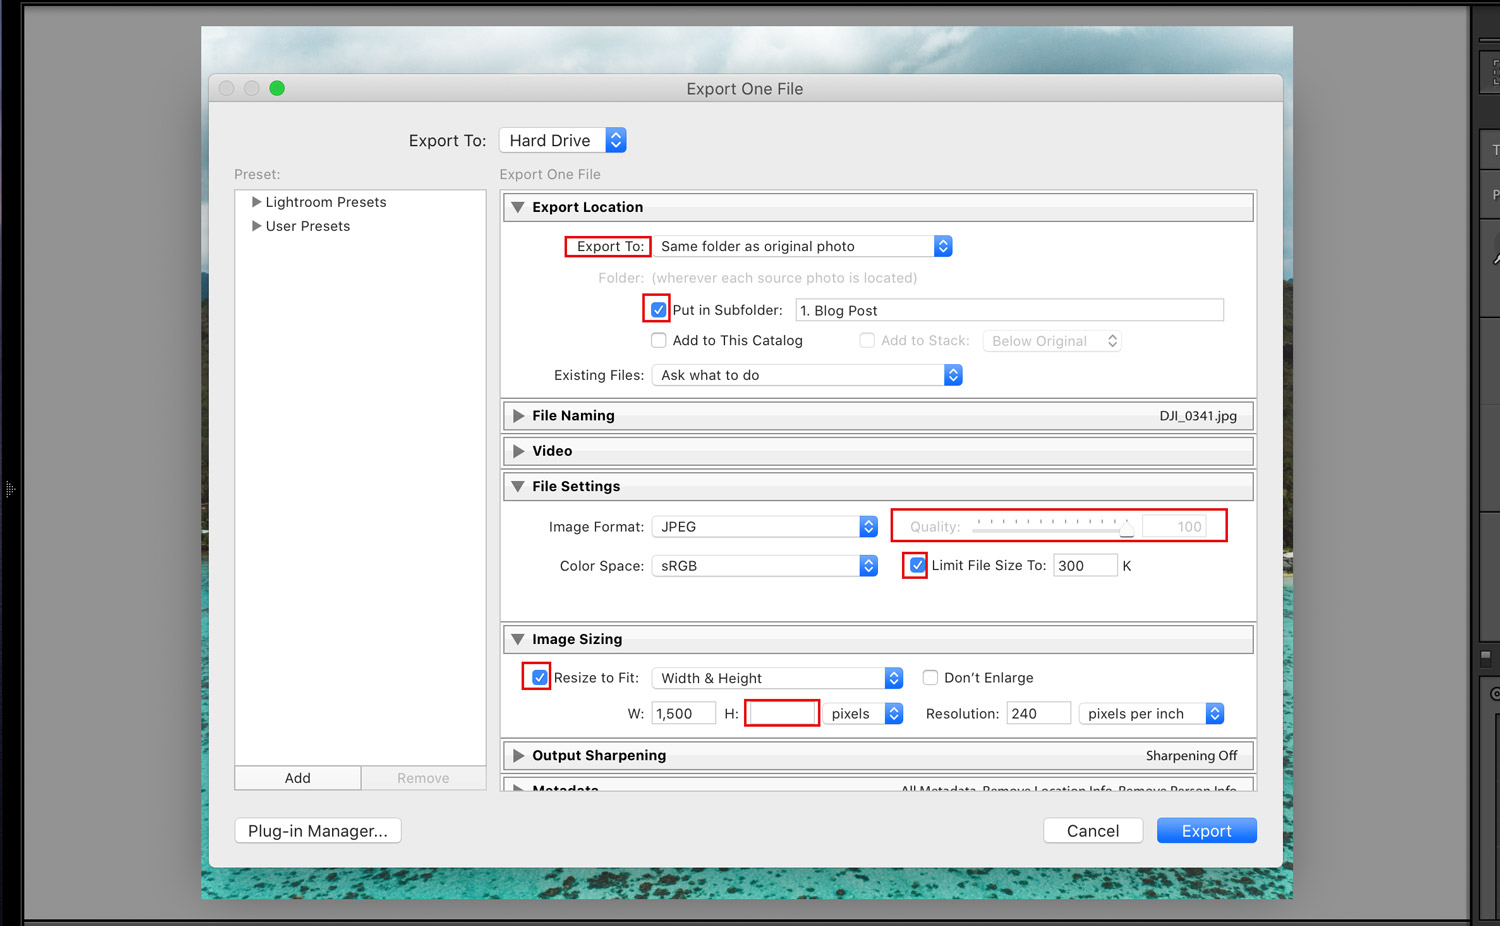
When it comes to exporting, you’ll want to consider where it’s going! Since I have this blog and use my photos on social media, I typically have a few go-to export settings.
I’ve highlighted a few areas on the export screen that I adjust.
Whenever I export, I always save to “same folder as original” and select “put in subfolder.” The subfolder is where I get specific. I usually separate export folders based on where they’ll go so either “Blog” or “Instagram” for example.
Here are specific size and quality settings to look out for:
- Instagram/Print: I typically want the highest resolution and size image as possible to ensure high quality. So, under “File Settings” I would de-select ‘limit file size to’ and ensure the “Quality” slider above it is at 100. I would also de-select ‘resize to fit’ under “Image Sizing.” This gives me the largest and highest quality export.
- Blog Post: If your image is going to live on the web, you will want to limit the file size and adjust the size of the image to optimize for your display. In my case, I know that my retina display settings are 1500px wide. And I try to keep blog post images under 300kb so that I don’t weigh my site down. I would follow the same subfolder settings as mentioned above. But, under “File Settings,” I would select ‘limit file size’ to 300. Then, under “Image Sizing,” I select ‘resize to fit’ and add W: 1500. Since you will have cropped your image in the editing process, you do not need to enter a number for the height.
- General Export: I try to limit the file size of images I send to my phone to post to IG stories or just to have. In that case, I would follow the same steps as ‘Blog Post’ above, but I would adjust the size slightly higher to about 500kb and W: 2000px (for landscape images) and W: 1500px (for portrait images).
![]()
And there you have it, folks—my beginner’s guide to editing in Lightroom! Please let me know if you have any questions or if you have any cool tricks you’ve learned!
See details

0 nhận xét:
Đăng nhận xét